Practical Typesetting with TeX Live
Introduction
These are my notes on typesetting for university reports. In this blog post, I will demonstrate the basic functionality of LaTeX in a hands-on practical tutorial, using the ACM article template (sample-acmlarge) and TeX Live.
In this tutorial, we will cover what typesetting is and why you should care, the basic components of LaTeX, how to use templates and finally some neat ways to streamline your workflow.
What is LaTeX
LaTeX is a markup language used for typesetting documents, such as books, academic literature, including university reports or anything that is intended to have a more polished and professional look than is generally achieved with a word processor. One of the first things you are likely to notice, if you are used to using word processor applications, is that LaTeX is written in a text editor, rather than a WYSIWYG interface. This may seem intimidating at first but the syntax for LaTeX is actually fairly straightforward and the essential commands not too numerous.
Document preamble
The section before the document begins is known as the preamble. In this section, metadata for the document is defined and packages included. At a minimum it must contain a document class and the document must be wrapped in the begin and end commands. There are many classes available, in this example I show an article. This should be included in a template and shouldn’t be changed. However, in a custom made document, you should research what would best suit your needs; a question on Stack Exchange discusses a few. The tex question site is an essential resource for information on how to use LaTeX. The usual advice applies when asking new questions.
\documentclass[12pt,a4paper]{article}

\begin{document}

% This is where you type your document.

\end{document}
Essential commands
There are probably too many commands in LaTeX to cover in this post while maintaining readability and relevance. However, there is merit to covering the most useful commands that are likely to appear in every template and discuss their use.
Comments
Comments are any line which begins with a percent sign. These lines are ignored by TeX Live and will not appear in the published document. They are used to explain complex sections of your tex file either to another reader, or yourself, in the future, when you’ve forgotten what you were trying to do.
% This is a comment
Packages
Huge amounts of functionality can be imported with packages. Options to the packages can be passed into the package using square brackets. For a complete example, let’s import the hyperref package:
\usepackage[colorlinks,linkcolor={black},citecolor={black}]{hyperref}
For the adventurous, more vivid colors are available!
Include files
Kind of like TeXception, you can include tex documents within your tex document. For example, to include a pre-made cover page located in the current working directory, you can use:
\input{./Title_page.tex}
Basic formatting
Without the ability to format text with buttons and menus, there are a few commands which you will quickly memorize. For example, you can emphasize text like this: \emph{emphasized text}
An incomplete list of basic formatting is shown below, for more, Google is your friend. Colors, text size, font and everything else can, of course, be formatted.
\textbf{such bold}

\textit{in italics}

\underline{much underline}

\texttt{teletype}
To force the beginning of a paragraph not to be indented, the \noindent command can be used.
Contents
The table of contents is generated automatically where you put the command \tableofcontents
Sections
Numbered sections and subsections which will automatically appear in the table of contents can be created with the following commands while unnumbered (sub)sections have a trailing asterisk:
\section{My section}

\subsection{My subsection}

\subsubsection{My sub subsection}

\section*{Unnumbered Section}
Text between these sections is just standard text, formatted according to your document class. In order to start a new paragraph, just leave a blank line.
Bullet point list
A simple bullet point list can be created using the following code:
\begin{itemize}\itemsep0pt

\item Reasons for using a bullet point list:

\item One.

\item Two.

\item Three.

\end{itemize}
Formula
LaTeX’s strong support for typesetting mathematical equations is a solid argument for using it for technical documents. A simple example – the law of cosines – looks like this:
\[ c = \sqrt{a^2 + b^2 - 2ab \ cos\gamma}\]
Listings
You can use the listings package to add listings to your document. Styling options are available to provide syntax highlighting for code, captions and more.
Tables
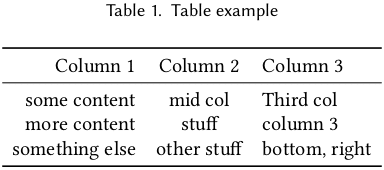
LaTeX can be used to produce beautiful tables. I won’t show that in this post, but here is a very simple example:
\begin{table}

\caption{Table example}

\label{tab:firexfly_demo}

\begin{tabular}{rcl}

\toprule

Column 1 & Column 2 & Column 3\\

\midrule

some content & mid col & Third col\\

more content & stuff & column 3\\

something else & other stuff & bottom, right\\

\bottomrule

\end{tabular}

\end{table}
The table has a caption and label. The {rcl} in the tabular block is for column alignment, in this case: the left column is right aligned, middle centered and right, left aligned. Columns are separated by & character and the rules draw the horizontal lines for our table.
Figures
You will likely add figures to many of your documents. In LaTeX, this can be achieved as follows:
\begin{figure}[H]

\centering

\includegraphics[width=\columnwidth]{example_image}

\caption{My example figure}

\label{fig:example_image}

\end{figure}
The H is a part of the float package and tells LaTeX to put the figure where you indicated it should go, rather than try to find the best place to put it.
Citations & references
The \cite{ID} command allows the inclusion of in-text citations. They refer to uniquely identified entries in the bibliography.
Similarly, references can be used to refer to figures, using labels which are applied to each figure. This looks something like \ref{fig:figure_label}
Appendices
These should be put in their own block to ensure they are numbered separately from the main document.
\begin{appendices}

\section{Appendix 1}

\begin{subappendices}

\subsection{Sub appendix 1}

\end{subappendices}

\section{Appendix 2}

\end{appendices}
BibTeX
The bibliography is usually written in a separate file, utilizing the .bib extension and always follows a specific format. Many academic journals and search engines, for example Google Scholar, provide the BibTeX for their articles, to be copied and pasted into your document. There are still some gotchas to be aware of, such as certain special characters (e.g. &), which need to be escaped with a backslash but aren’t always.
An example citation, in my bibliography.bib file, for Ross Anderson’s excellent book on Security Engineering, looks like this:
@Inbook{SecEng,

author = {Anderson, Ross J.},

title = {Security Engineering: A Guide to Building Dependable Distributed Systems},

year = {2021},

publisher = {Wiley Publishing},

address="Hoboken, NJ",

edition = {3},

pages = {42--44}

}
The format is @Type{IDUsedToCite, and then the metadata for the reference is entered. The exact content and format of the reference inserted in your document will depend on the reference style. A basic Harvard style can be achieved by including the commands:
\bibliographystyle{agsm}

\bibliography{bibliography}
When there are multiple authors, they can be specified in a list separated by the and keyword.
pdfTeX
When you are ready to compile your document into a PDF, ensure TeX Live is installed and run the following commands in your shell prompt (this assumes your main document is called report.tex and your bibTeX references are in bibliography.bib, all in your current working directory):
pdflatex report.tex

bibtex report

pdflatex report.tex

pdflatex report.tex
Tutorial challenges
The time has come to put all this knowledge into practice!
- Download a suitable template
- Delete the sample content and replace it with your own. If you’re feeling like your creativity is lacking after learning all this typesetting, you can generate your own sample content.
- Use as many of the commands above as you can and experiment with formatting it to make it look like you want. For bonus points, go experiment with more advanced styles.
- Add some references from your favorite places (or mine).
- When you’ve added all the content you want, compile your document into a PDF.
- If LaTeX hangs and doesn’t return to your terminal prompt, learn to debug your errors. A good place to start is unescaped special characters.
Workflow
This section contains various quality of life improvements to make typesetting in LaTeX a slightly more comfortable experience.
Macros
LaTeX allows the definition of macros which are user defined commands. This can reduce the burden of having many similar objects in a document by automating the inclusion of markup. This is particularly useful for figures because adding figure locations along with captions and labels for in-text references can be laborious.
\newcommand{\figuremacro}[4]{

\begin{figure}[#1]

\centering

\includegraphics[width=#4\columnwidth]{#2}

\caption{#3}

\label{fig:#2}

\end{figure}

}
This code goes in the preamble and allows us to define the same style of figure we showed earlier with a more concise format. The \newcommand command takes a name for your macro and a number of arguments followed by a formatted code block, where the #number indicates which argument to insert. This allows us to add the previous figure with the following command:
\figuremacro{H}{example_image}{My example figure}{1.0}
Git
Version control is as essential for a dissertation as it is for any code that you write for your project. Don’t lose your hard work to silent data corruption or your cat walking over your keyboard! Instead use version control, git is my preference. And push to a remote server, either set up your own which is a fairly simple process that allows you to maintain control of your data. Otherwise use a 3rd party service like GitHub.
Compiling your documents
The process of typesetting can involve a lot of repetition, for example, when a change is made to the document and it needs to be recompiled. Furthermore, the same commands need to be entered multiple times. A simple way to make the process more tolerable is to create a Makefile; here’s one I made earlier:
Thanks, I hate it
Not convinced yet? The workflow for TeX Live is a little complex and I had to write this blog post in order to bring me back up to speed after not using it for a while. It gives me control over my data and, using this workflow, the process works for me. However, if you’re keen on word processing in a cloud based or non-cloud based word processor and the idea of writing your document in a text editor is not appealing at all, you could try an online LaTeX application, such as Overleaf. The Cloud-based, real-time collaboration software for LaTeX with version control and templates included. While it might not be as pointy-clicky as what you’re used to, it is a big step towards a usable graphical interface.
Or you can always just go on word processing your documents. No one’s judging you, really.